Sunday, October 12, 2014

Inspired by Columbus: Tandoori Grill

Tandoori Grill
808 Bethel Rd.
Columbus, OH
614-326-3777
Facebook Page


If you can handle a little heat, Tandoori Grill might just the best Indian food you'll find here in Columbus.  Their website says, "brace yourself for a culinary master class – a festival of flavors in every forkful – and allow yourself to be swept away by the exotic aromas and tastes of truly outstanding Indian-Pakistani cuisine." This is a bold claim, but they deliver.  


Tandoori Grill has an attractive but casual setting centered around a beautifully painted wall and several eye-catching light fixtures. We walked in for lunch at 11:20, about 10 minutes before they officially opened, but they kindly accommodated us anyway.  


We ordered Isaac a delicious mango lassi while we looked over the menu which included all the classics I expected and a few things I hadn't heard of before. Considering the quality of food they were boasting, I was pleased with the middle-of-the-road prices.


We started with potato samosas and fish pakora and then moved on to chicken tikka masala and goat korma with an order of plain naan.  Everything was perfectly cooked and perfectly seasoned, certainly among the best, if not the best I have had in Columbus.  I do feel compelled to offer one caveat.  See those peppers in the bottom right of the menu, I think they are there for a reason.  Even though we ordered traditionally mild dishes, like chicken tikka masala and asked for them to be mild, all of the dishes we ordered, the potato samosas, the fish pakora, the chicken tikka masala, and the goat korma were all unpalatably spicy with no indication on the menu that this would be the case.  Make no mistake, this food tasted amazing and if you enjoy spicy foods you will love it. Spiciness aside, I really did enjoy our experience and was looking forward to making an original Indian dish when I got home.

How I was Inspired

I have made flatbread pizzas before, but have always stuck with fairly traditional flavors. Considering how much I enjoy chicken pizzas and also because I like sopping up my curry with naan, I thought a chicken tikka masala naan pizza sounded delicious.


I started by combining salt, pepper, cumin, and coriander with some plain yogurt, vegetable oil, garlic, and ginger and then coating the chicken with it and letting it sit for an hour before broiling it until it was spotty brown all over.  Normally, this chicken would be cut up and tossed with the masala sauce, but I decided to leave it the way it was.


Next I sauteed some minced onion, chile pepper, garlic, ginger, tomato paste and garam masala until softened and fragrant.  I added some crushed tomatoes and salt to taste and simmered for 15 minutes.  Then, off heat, I added heavy cream.

I shredded some paneer cheese and was ready to assemble my pizzas.  I put down a generous layer of masala sauce on a round of naan (the naan can absorb quite a bit, so no need to be dainty).  Then I topped it with paneer cheese and chicken and baked it at 500 degrees for about 5-8 minutes.  The cheese will not melt, so you are mostly just darkening and crisping the bottom of the naan.  Finally, I topped it with a few leaves of cilantro and served it up.


Chicken Tikka Masala Naan Pizza
  • 1/2 tsp. ground cumin
  • 1/2 tsp. ground coriander
  • 1 tsp. salt plus more to taste
  • 1/4 tsp. black pepper
  • 2 lbs. boneless skinless chicken breast
  • 1 cup plain whole-milk yogurt
  • 2 Tbsp. vegetable oil, plus more for sauteing
  • 4 garlic cloves, minced
  • 2 Tbsp. fresh grated ginger
  • 1 onion, diced
  • 1 serrano or jalapeno chile, seeds and ribs removed, and minced
  • 1 Tbsp. tomato paste
  • 1 Tbsp. garam masala
  • 28 oz. crushed tomatoes
  • 1/2 cup heavy cream
  • cilantro leaves for garnish
  • 4 oz. paneer cheese, shredded
  • 4 rounds of naan
  1. Mix the cumin, coriander, 1 tsp. salt, black pepper, yogurt, vegetable oil, 2 minced garlic cloves, and 1 Tbsp. ginger together.  Dredge the chicken in the yogurt mixture and set aside on a broiler pan for one hour.
  2. While the chicken marinades, saute the onion in a little vegetable oil over medium heat until very soft.  Add the remaining garlic and ginger, chile, tomato paste and garam masala and cook until fragrant.  Add the crushed tomatoes and bring to a simmer over medium-high heat.  Reduce the heat to medium-low and simmer for 15 minutes.  Off heat, add the heavy cream and salt to taste.
  3. Gently broil the chicken until well-browned on one side then turn over and brown on the other side.  Let the chicken cool five minutes before slicing.
  4. Spread a generous amount of sauce onto the naan then top with shredded cheese and sliced chicken.  Bake at 500 degrees for 5-8 minutes until the bottom of the naan is well-browned and crisp.  Top with cilantro leaves and serve.
Next week I'm going to take you to one of the best breakfasts I've had in Columbus and show you a different take on breakfast.

Friday, October 10, 2014

Inspired by Columbus: The Orchard and Company

The Orchard and Company
7255 US HWY 42 North
Plain City, OH
Saturdays and Sundays, 11am-6pm, September and October
614-873-0510
Facebook Page


There are other U-pick orchards I can recommend, like Lynd Fruit Farm.  There are other Fall Festivals I enjoy, like Pigeon Roost Farm.  But The Orchard and Company does an excellent job of combining both of these concepts together. After parking you are greeted to a hay castle facade behind which their pumpkins sit awaiting purchase.


There is a lot to do at The Orchard and Company.  It has the obligatory pumpkin patch, hay ride, apple picking, and petting zoo, but also a few unique offerings.  This includes a zipline, pedal cars, slides, and more.


Isaac's favorite two areas were the massive jumping pillow and the corn pit, which comes loaded with trucks to play with.  The jumping pillow in particular is an attraction I had never seen before and it could hold a lot of kids who were all having a great time.


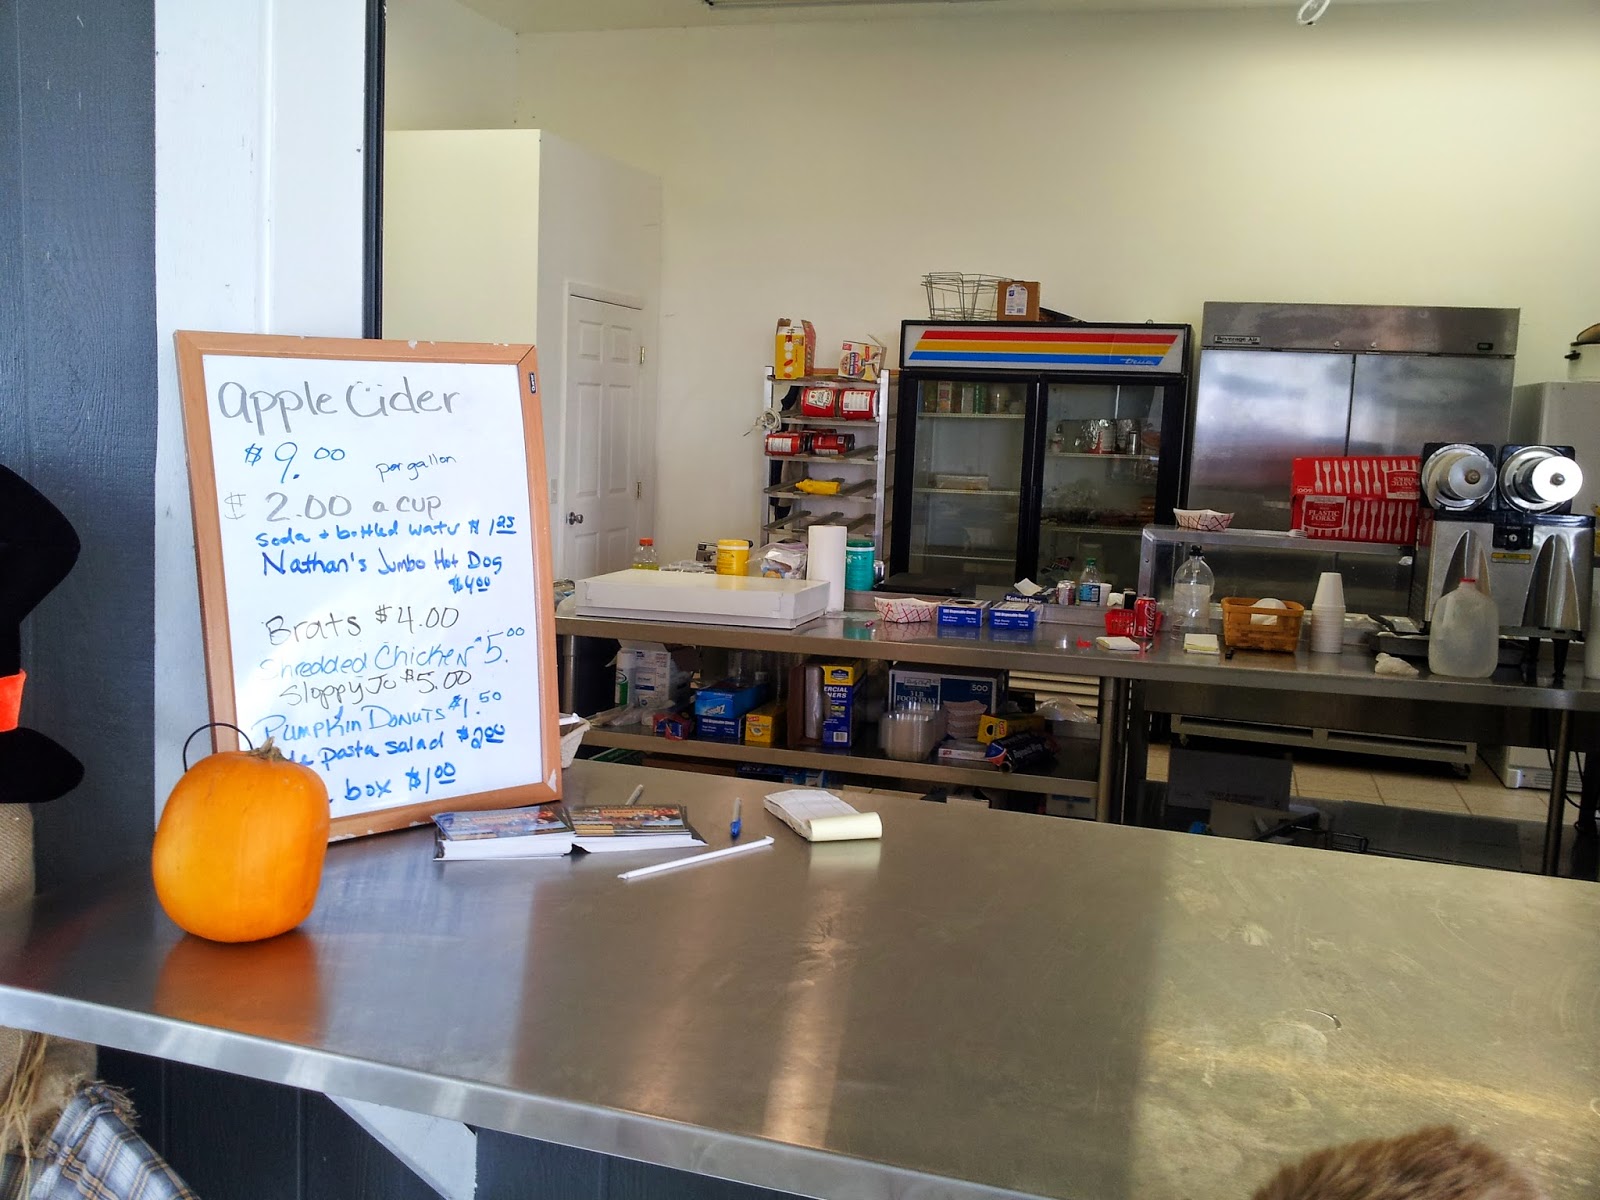
There is also a large pavilion with face painting, goods for sale, and a cafe which sells the standard fall festival fare like cider, hotdogs, and pumpkin donuts.  The Orchard and Company was not cheap, and Isaac and I had already had lunch, so we didn't partake in any of these snacks, but looking at this menu I started to get an idea.

How I was Inspired
I have been going to orchards and fall festivals for years and one of the things I have tried repeatedly is the cider dog.  I love the concept of a smoky salty hotdog mixed with a sweet and richly flavored cider.  However, I almost always find the hotdog is unaffected by the the addition of cider and I'm disappointed.  So I set out to infuse as much cider flavor into a hotdog.


I looked at a lot of ideas for this dish, and though I ended up making something that was my own, I was definitely inspired by the blog Heather Likes Food and Epicurious. First, I diamond cut the hotdogs so they would hopefully absorb as much flavor as possible.  Then I reduced 2 cups of apple cider down to 1/4 cup and added 2 garlic cloves and 1/4 cup apple cider vinegar.  I marinaded the hotdogs for 24 hours.


Next, I braised an apple (that I picked while at Orchard and Company) and half an onion in apple cider until very soft and sweetened by the cider.


Finally, I broiled the hotdogs until well-charred, added smoked cheddar, and broiled again to crisp up the rolls and melt the cheese.  I topped the dogs with the apple/onion mixture and some barbecue sauce that I mixed with another 2 cups of cider that I reduced down to 2 Tbsp (in retrospect I think a whole grain mustard mixed with the reduced cider might have been even better).  I served them with some delicious sweet potato chips.


Cider-marinaded hotdogs with cider-braised apples and onions, smoked cheddar, and cider barbecue sauce.
  • 8 hotdogs and rolls
  • 1/2 gallon sweet apple cider
  • 2 cloves garlic, minced
  • 1/4 cup apple cider vinegar
  • 1 apple, sliced thin
  • 1/2 onion, sliced thin
  • 4 oz. smoked cheddar, shredded
  • 1/2 cup barbecue sauce
  1. Boil 2 cups of cider over high heat until reduced to 1/4 cup. Mix reduced cider with vinegar and garlic and put in a shallow dish.  Cut a diamond pattern into both sides of the hotdogs and submerge in the marinade.  Refrigerate for 8-24 hours.
  2. Braise the apple and onion in 2 cups of sweet cider over medium high heat until very soft and sweet.  Set aside.
  3. Boil 2 cups of cider over high heat until reduced to 2 Tbsp.  Mix with the barbecue sauce and set aside.
  4. Broil the hotdogs turned as needed until well-charred on all sides.  Remove and put in hotdog rolls.  Top with some shredded cheese and gently broil until the rolls are golden brown and the cheese is melted.
  5. Top the hotdogs with the braised apple and onions and some barbecue sauce and serve with sweet potato chips.

Monday, September 22, 2014

Inspired by Columbus - Taste of Dublin

Taste of Dublin (Sept. 17, 2014)
The Conference Center at OCLC
6600 Kilgour Pl.
Dublin, OH
Facebook Page
(next event Sept. 22, 2015)


If you've never been to a "Taste of" event (there is also Taste of the Future, and probably others) they are a lot of fun.  After purchasing a ticket, you can sample any or all of the provided by the vendors.  In the case of Taste of Dublin, the vendors are either local to Dublin, have one of their locations in Dublin, or just wanted to add to the festivities regardless of location (looking at you Tip Top). There are also drink stations scattered around the event where you can get up to two complimentary beverages (beer, wine, soda, or water). Lyndsay and I got a babysitter and spent a few hours on a date (probably the last one before the baby is born) just sampling food and enjoying each others company.


There were vendors and sponsors spread outside and inside, making the event feel like it had four distinct areas to peruse.  The event was sold out, so it was nice to be able to move from place to place as needed to get out of the crowds, though it did take us awhile to figure out where everything was. One thing I always like about these kinds of events is that there are so many vendors it is fun to find out where the real standouts are.  Because when you have Costco and Jeni's a stone throw from each other you know you are going to get a wide range of things to try.


One of the standouts was Fresh Thyme Market. They had a beautiful display and many things to sample, including bacon candy, stuffed grape leaves, watermelon gazpacho, hummus and fruit.  However, the real standouts were their cheeses.  I had a fantastic Iberico cheese and a nice brie with fig spread.  They also had a strawberries and marscapone in a candied sesame seed cone, which was very creative and had a nice blend of salt and sweet.


Tip Top had maybe the nicest display of the evening and to compliment they had their chicken salad in mini-phyllo cups and freshly made smoked gouda grilled cheese sandwiches. Right next to them was one of the most well-balanced dishes of the day, described in the picture above.  This was, I believe, prepared by Brookside Golf and Country Club.


Matt the Miller's Tavern played a pretty good (albeit unintentional) trick on people, such as myself, who didn't take the time to read before stuffing their face.  I thought I was getting homemade chips and salsa and was very pleasantly surprised when I found it was a delicious raw gingery Ahi tuna on a wonton triangle.  I should make this version of chips and salsa for a party sometime.


But my very favorite dish of the evening was made by The Morgan House Restaurant. This grilled cheese sandwich was perfection.  It was made fresh with two kinds of very complimentary cheeses and served with the best Tomato Bisque I've ever had.  I knew as soon as I ate it that I wanted to do my own adult grilled cheese at home this week.

How I was Inspired

After enjoying my fig brie from Fresh Thyme and my grilled cheese from The Morgan House Restaurant I got to thinking about how much I enjoy bacon-wrapped stuffed figs and knew this was the direction I wanted to take my sandwich in.


Like all great grilled cheese sandwiches you don't need much to make it great and there really isn't a set recipe to follow.  Get your favorite sandwich bread or make your own, crisp fry the best bacon you can find (I recommend the double smoked or pepper bacon from Thurns) get a small wheel of brie, some salted butter, a griddle, and you're good to go.

The trick to making a really great grilled cheese sandwich is all about how much butter you put on your bread and the temperature of the griddle.  For the butter, you shouldn't be scraping as thin as possible, nor should it be thick and gloppy.  The temperature, well, that depends on the type of griddle you are using and the type of heat source you are using.  On my stove-top griddle shown here, I used the largest gas burner on my stove set just slightly below medium heat.  I let it preheat for exactly five minutes and I cooked the sandwiches for 

exactly three minutes on each side.
But if you were using a thicker or thinner griddle, are smaller or larger burner, or an electric griddle, these things can change dramatically, making the sandwich burn quickly or soak the butter into the bread, making the sandwich soggy. For this reason it is good to experiment with grilled cheese sandwiches until you get the hang of them with your equipment and then don't deviate from that.  I hate cooking grilled cheese at someone else's house because I always ruin at least one sandwich.  I also find this to be true with pancakes.

For these sandwiches, after spreading the butter on the bread I quickly spread a thin layer of the fig spread on the bread after it was already put on the hot griddle.  It is important that you use as little fig spread as possible to cover the bread because it is very sweet and will overpower the other ingredients quickly.  Then I added slices of brie and slices of the crisp bacon and topped it with the other slice of buttered bread.


And there you have it, six minutes later and my family is eating a delicious salty sweet, crunchy gooey, perfect grilled cheese sandwich that I think would fit in well at The Morgan House.  Be sure to check out next year's Taste of Dublin or Taste of the Future.  Next week, I'll be bringing a recipe inspired by my trip to local orchard and fall festival.

Sunday, September 21, 2014

Inspired by Columbus: Roosters - part 2


Sorry for the delay on this post.  To make it up to you, I will do two posts this week.  As promised, I wanted to introduce you to Korean fried chicken wings, which I often think about fondly after eating Roosters Sweet Thai Chile wings pictured above.  These wings and their sauce are quite easy to make and they are so good.


Start by tossing some chicken wing sections in salt and cornstarch in a large bowl until the wings are well coated. Whisk together some additional cornstarch with water and then toss the sections in this mixture to coat.


Fry in small batches in 375 degree oil until the for about 5 minutes and then using tongs, a skimmer, or a slotted spoon remove the wings and set aside on a cooling rack placed in a 200 degree oven.  Fry the remaining batch or batches in the same way making sure the oil gets back up to 375 degrees in between each batch.  


Fry each batch a second time until they are golden brown, putting the finished batches in a large bowl.


Simmer some minced garlic, sugar, soy sauce, water, sriracha, and rice vinegar together in a saucepan until thickened.  Toss the wings with sauce and serve.  You can also add some minced cilantro and thin sliced scallion when tossing for additional flavor and color.


Korean Fried Chicken Wings
  • 2 quarts vegetable oil
  • 3.5 lbs chicken wing pieces
  • 1.5 c. cornstarch
  • 1.25 c. water 
  • .5 c. sugar
  • .25 c. soy sauce
  • 3 cloves garlic, minced
  • 1 Tbsp. rice vinegar
  • 1 tsp. sriracha
  • 1 Tbsp. minced cilantro
  • 2 scallions, sliced thin
  1. Heat the oven to 200 degrees and heat oil in a large stockpot or dutch oven over medium high heat to 375 degrees.
  2. While the oil heats, toss the wing pieces and 1/2 cup cornstarch in a large bowl.  Whisk together the remaining 1 cup cornstarch and 1 cup of water until smooth.  Toss the wing pieces with the cornstarch slurry until the wings are well coated.  
  3. When the oil gets up to temperature add 1/3 or 1/2 of the wings (depending on pot size, do not overcrowd).  Stir the pieces to prevent sticking and cook for 5 minutes.  Remove with tongs, a skimmer, or slotted spoon to a wire rack set over a cookie sheet in the oven.  Fry and remove the remaining batches in the same manner, making sure the oil temperature gets back up in between batches.
  4. Fry the first batch a second time until deep golden-brown, about 5 more minutes.  Transfer the finished wings to a large bowl and repeat with the remaining batches.
  5. Simmer the sugar, remaining 1/4 cup water, soy sauce, minced garlic, vinegar and sriracha or medium heat until syrupy.  Toss the finished with the sauce and cilantro and scallions if desired and serve.
In the next couple of days I'm going to let you about an event Lyndsay and I went to called Taste of Dublin and some of the great food we had there.

Saturday, September 6, 2014

Inspired by Columbus: Roosters - part 1


Roosters may have started in Dayton and is now in multiple states, but with 10 locations it is the Columbus area that has embraced this "fun, casual joint" the most heartily. I have tried sauced wings all over the city and I will admit to having a bias towards Roosters even before this post.


If you've never been before, Roosters has the feel of a large sports bar.  This means lots of muted TV's, beer signs, and in Roosters case, colorful sayings posted all over the walls.  It often feels busy, and a little loud, but because it has so much seating I have never had to wait for a table.  All the staff work quickly so no matter how busy it is I have never found the service to be lacking.


The sports bar aesthetic continues through the menu  which focuses heavily on wings and other fried foods as well as burgers, sandwiches, pizzas, and salads. One thing I like about Roosters is that everything I have had there has been pretty good, though the wings are an obvious standout. The food is also very reasonably priced; I often pay less for a full-service meal here than a trip to a food-truck.


Honestly, besides the wings, I can never decide on which appetizer I want.  Taking a queue from the state fair they have a lot of foods deep-fried for easier consumption like mini corn dogs, fried pickles, mac-and-cheese bites, fried mushrooms, and that's just to name a few. I ordered the mac-and-cheese bites and Isaac always orders the mini corn dogs kids meal so I borrowed them for the picture.  I also got some wings half Carolina gold and half Sweet Thai Chile.  Finally, Lyndsay, who couldn't really handle all the fried goodness ordered the Cobb salad.  As expected everything was excellently prepared, best in it's class without breaking any boundaries.  

How I was Inspired
Part 2 will focus on the wings, but my first, and more interesting idea was to take the concept of deep-frying foods and apply it to something that isn't normally deep-fried. I decided to take traditional Spanish tapas and give it the sports bar treatment by battering and breading it.  After looking at a lot of options I settled on Chorizo stuffed mushrooms, Spanish meatballs, and Manchego cheese.


To make the Spanish meatball I started by soaking some bread in milk until it was soft enough to be beaten into a paste.  Then I added ground beef and pork, parsley, egg, salt and pepper, garlic, and Manchego cheese, mixed thoroughly and rolled it into 3/4" balls (any bigger and they will be too hard to eat in one bite).


To accompany the meatballs I made a sauce with onions, tomatoes, broth, wine, and picada which is a mixture of  finely chopped almonds, minced garlic, saffron, and parsley added after the sauce is finished simmering.


The mushrooms and Manchego cheese were really easy.  I removed the stems from some white mushrooms and then filled them with raw chorizo.  I removed the rind on the cheese and then cut it into small cubes.


I made a thick batter (think pancake batter), put some panko in small bowl, and battered each piece then rolled it in panko.  The most important thing I learned in the process was that the dripping batter quickly made the panko unusable so use small amounts at a time and wipe out the bowl regularly. Also, for the Manchego, freeze them after breading for at least an hour so the cheese is less likely to ooze out.  I fried the pieces in stock pot containing 1 quart of 375 degree oil until they were golden brown as shown above.


You'll notice that only the mushrooms, pictured in the back, look right.  This is because I ran out of panko as a result of the problem I mentioned above.  But, they still tasted pretty darn good, though not as crunchy as the mushrooms, which were amazing.  I topped the mushrooms and Manchego with a drizzle of honey and smoked paprika.

Recipe for deep-fried tapas (serves 6 as an entree or 10 as an appetizer)


  • 2 slices of white bread, torn into quarters
  • 1/3 cup whole milk
  • 8 oz. ground beef
  • 8 oz. ground pork
  • 3 Tbsp. minced fresh parsley
  • 1 egg yolk
  • 3 garlic cloves, minced
  • 3/4 tsp. salt
  • pinch pepper
  • 1 small onion, minced 
  • 1 small tomato, minced
  • 1 cup chicken broth
  • 1/2 cup dry white wine
  • 2 bay leaves
  • 1 Tbsp. finely chopped almonds
  • 1/4 tsp. crumbled saffron threads
  • 14 tsp. paprika
  • 9 oz. Manchego cheese, rind cut off, 1 oz. shredded, the rest cubed
  • 12 oz. white mushrooms, stems removed
  • 1/3 lb. uncased chorizo sausage
  • smoked paprika and honey for garnish

Oil, Batter and breading

  • 1 quart vegetable oil
  • 2 cups flour
  • 1 cup cornstarch
  • 2 tsp. baking powder
  • 1/2 tsp. salt
  • water to get it to the desired consistency
  • 4 cups panko
  1. Combine the milk and the bread and let it sit for a few minutes until saturated.  Mash it into a paste and then add the ground meat, shredded cheese, 1 clove minced garlic, 2 Tbsp. minced parsley, salt, pepper, and egg and mix until uniform.  Form the meat into 3/4" meatballs and set aside.
  2. Saute the onion over medium heat until very soft and lightly browned.  Add the tomato and cook for 1 minute.  Add the broth, wine, and bay leaves and simmer until thickened.  Mash together the remaining minced garlic, minced parsley, almonds, saffron, and paprika and stir this into the mixture after it has finished cooking.
  3. Heat the oil in a large stockpot over medium high heat until it reaches a temperature of 375 degrees. While it is heating, mix the the flour, cornstarch, baking powder, salt, and water to make a thick, but still drippy batter.  Put a little bit of panko in shallow pan. Have 2 baking sheets ready.  Dip each cheese cube into the batter with a long skewer and then roll in the panko, adding more panko and cleaning the dish as needed to prevent clumping.  Set each cheese cube on one of the baking sheets and put in the freezer. Repeat with the meatballs and mushrooms, but do not freeze them.  
  4. Once the oil is ready, fry the meatballs in batches first, pulling them out when they they are deep golden brown with a pair of tongs or a skimmer and setting them on a paper towel lined plate.  Repeat with the mushrooms, then finally the semi-frozen cheese.  Check your oil temperature from time-to-time to make sure it is staying hot enough.
  5. Serve the meatballs with the sauce and garnish the meatballs and mushrooms with some honey drizzle and smoked paprika.

Stick with me because next week I will show you how to make Korean-style fried chicken wings, which I would put up against any wing I've ever had.